This month was my nephew Mr. B's 7th Birthday, and since he is such a huge Star Wars fan, we had a very SciFi month. =) The party featured things like Darth Maul dogs and Yoda Soda and pretzel stick light sabers. The kids played hard with their party favors of light sabers made out of pool noodles and popped balloons with pictures of the Emperor and his lackeys.
And of course, then there were the gifts... Mr. B's current fascination is Legos (Personally, I'm hoping this never changes.) so we got him several new Star Wars building kits. And I found a really cute retro lunch box with C-3PO and R2-D2 on it. However, my favorite gift that I gave him (Because, of course his gifts are all about ME! lol) was a Yoda shirt that I "painted" with bleach.
Here's how to make a shirt this way.
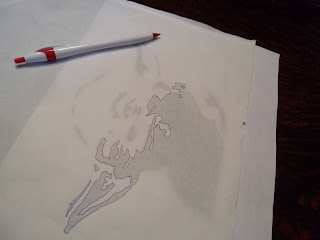
The internet has several tutorials for making shirts with freezer paper stencils, but this one was a little different because I was using a negative stencil. Since the shirt was black and I was using bleach, I wanted the parts that would normally be painted to stay the original black. This meant that instead of cutting out a normal stencil that I would fill in, I had to cut out and keep the void areas.
STEP 1:
Gather your supplies.
Freezer Paper (like wax paper, but with wax only on one side)
Image (For this kind of project, you'll want a silhouette that is as simple as possible.)
Pen/Pencil
Scissors/X-acto knife
Iron
Spray bottle
Bleach
STEP 2:
Trace your image onto the paper side of the freezer paper.
Make it as detailed or simple as you want.
STEP 3:
Cut out your stencil.
Make you keep the dark areas of the image.
STEP 4:
Iron your stencil to your shirt. (Sorry. I forgot to take a picture of this step.)
Use your image as a guideline for positioning the stencil pieces, ironing on only a few at a time. Also, put a large flat piece of freezer paper or cardboard inside the shirt to keep from transferring the image to the back of the shirt when you bleach it.
STEP 5:
Bleach shirt.
Using a spray bottle filled with a mixture of 1 part bleach to 2 parts water, spray around the image. Remember, a black shirt will turn a brown/orange color (If you leave the bleach on for a really long time, it will eventually turn grey.) I always spray lightly all over the shirt and then flip it over to spray the back, too. This makes it look more uniform.
STEP 6:
Rinse out the bleach.
Once you can see it has started turning, remove the paper pieces and rinse out thoroughly using water. The water will turn brown as you are washing it, so be careful to not splash it on anything. After this initial rinse, you need to launder the shirt to make the image color-fast. Be very careful that you don't wash it with anything else (unless you make several shirts) because it will fade all over them.
STEP 7:
Wear and enjoy! =)


No comments:
Post a Comment